

So you have metal decking spec’d on the plans for your project. You are tasked with installing it. Did you know that there are different ways to connect the sidelaps? Also, the name of the panel often (not always) indicates how the sidelaps are connected.
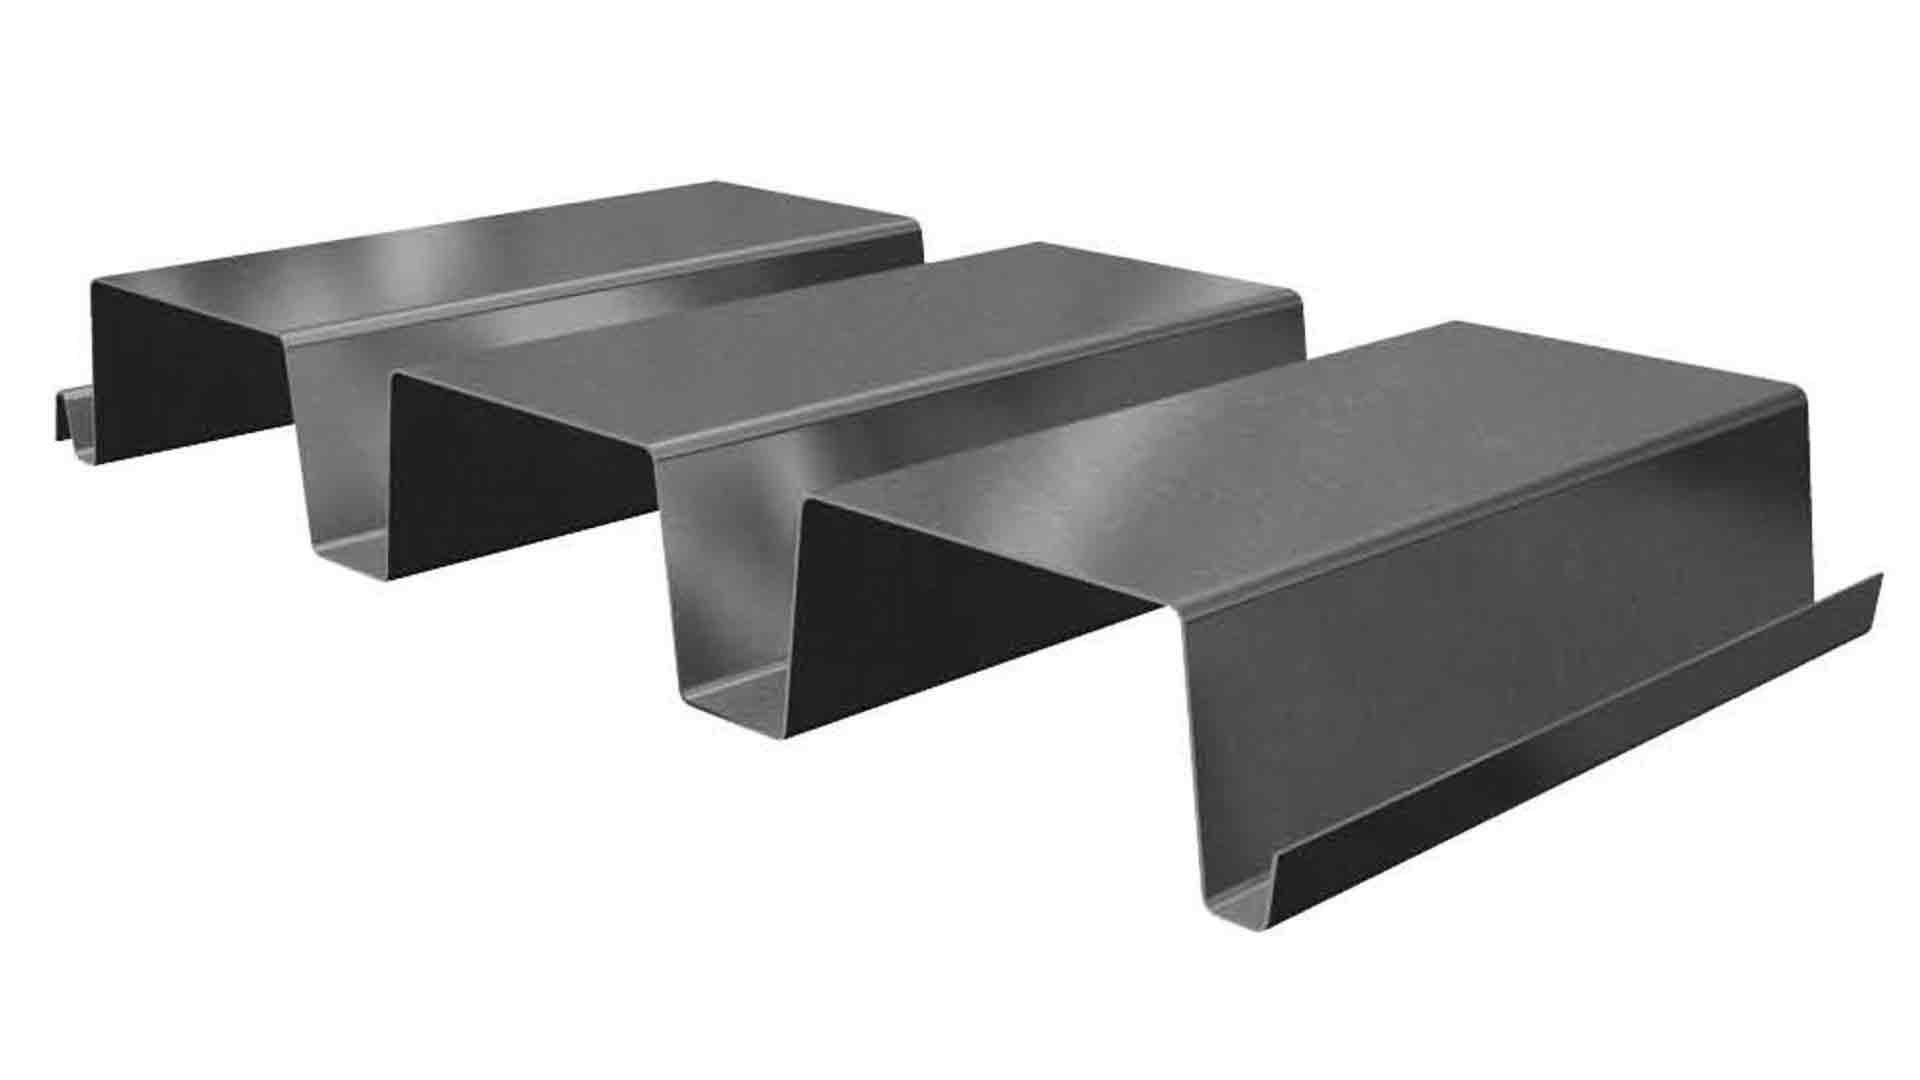
Metal Deck panels are made with different sidelaps and sidelap connections. While some profiles are manufactured with only one sidelap, others can be manufactured with the option of a different sidelap. A panel made with more than one sidelap is referred to by different names. This helps differentiate it so that you know which type of sidelap connection to use.
At Western Metal Deck, we understand that a panel with different sidelaps, names and connections can be confusing and a bit overwhelming. In our 30+ years of selling metal deck, we have stocked and sold each sidelap type. Our metal deck sales team has had years of experience installing and detailing shop drawings for metal deck. This expertise has allowed us the ability to answer all of your questions on the different sidelap types and connections.

In this article we will go over the most common sidelap types and connections for:
What is a Standard Interlocking Sidelap?
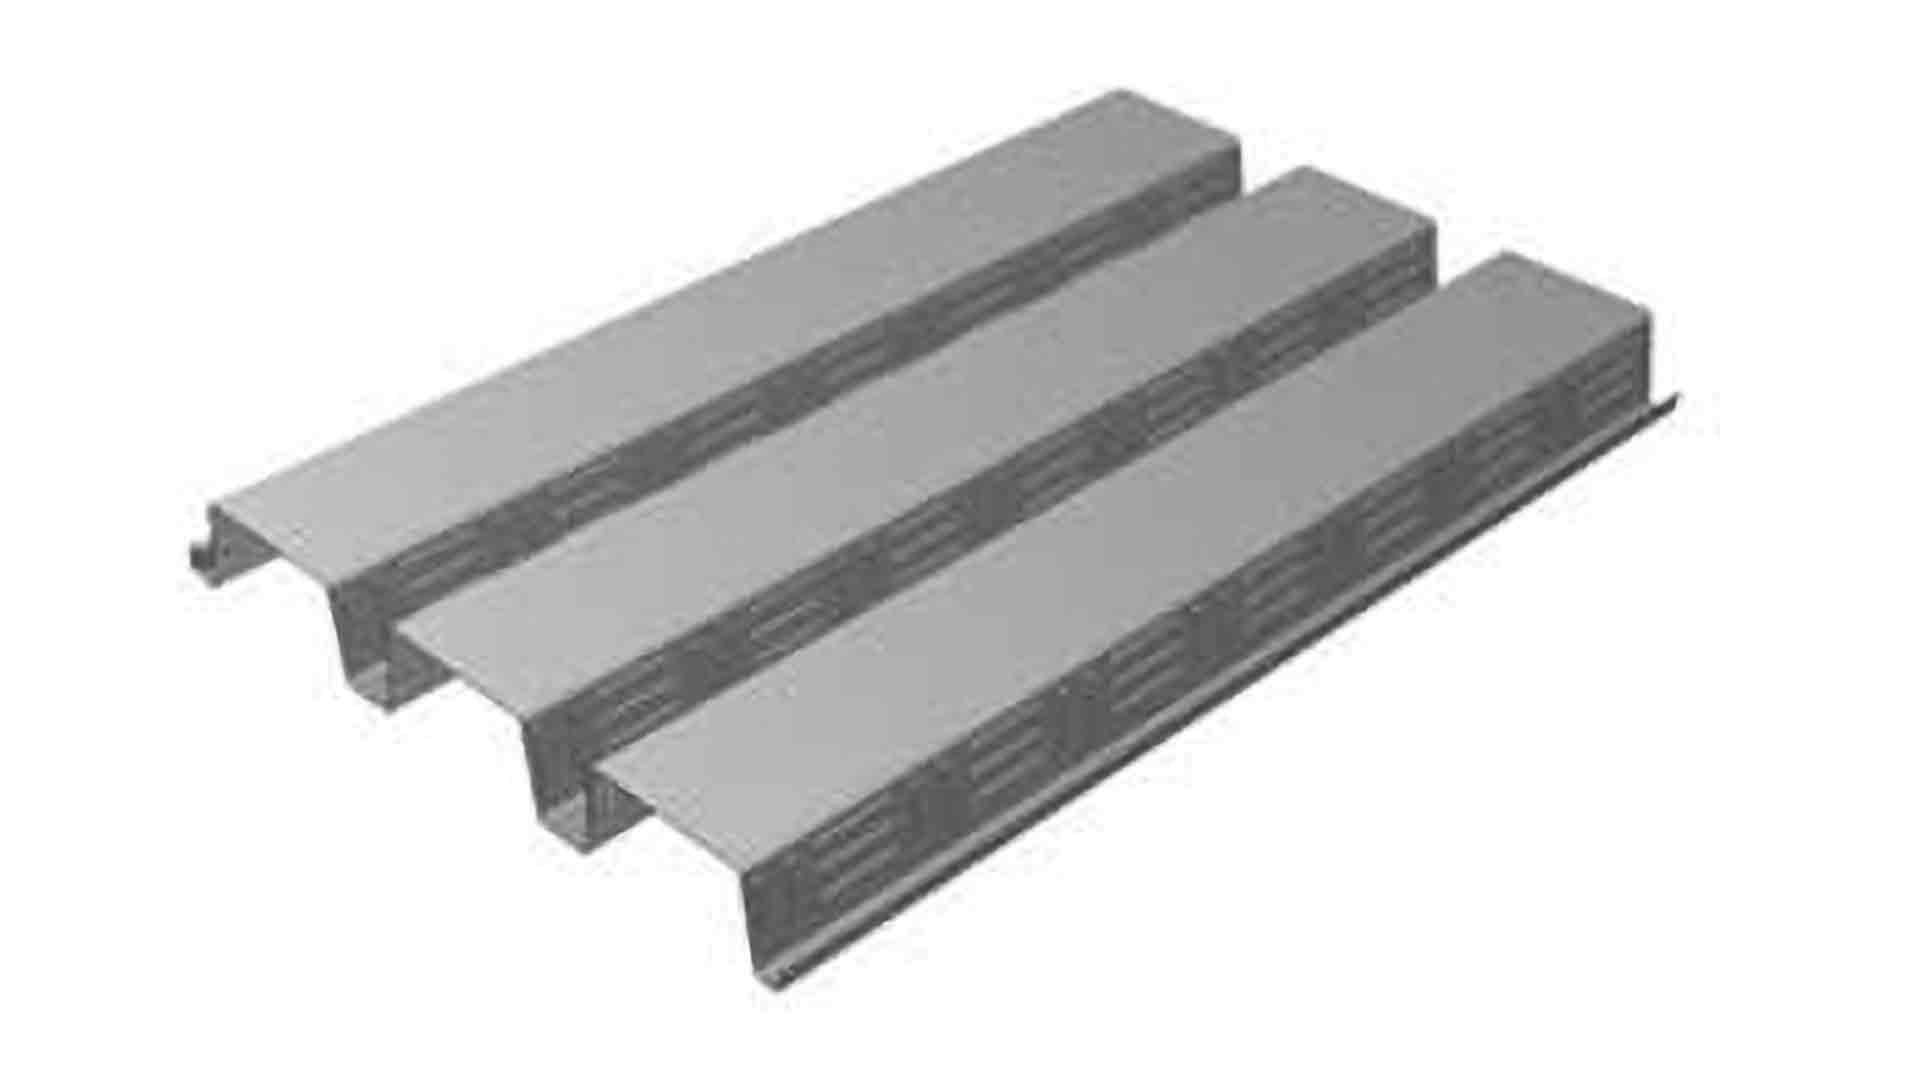
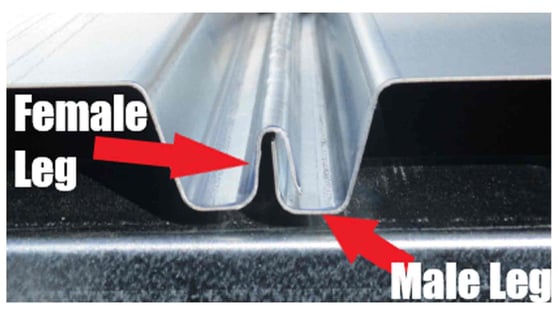
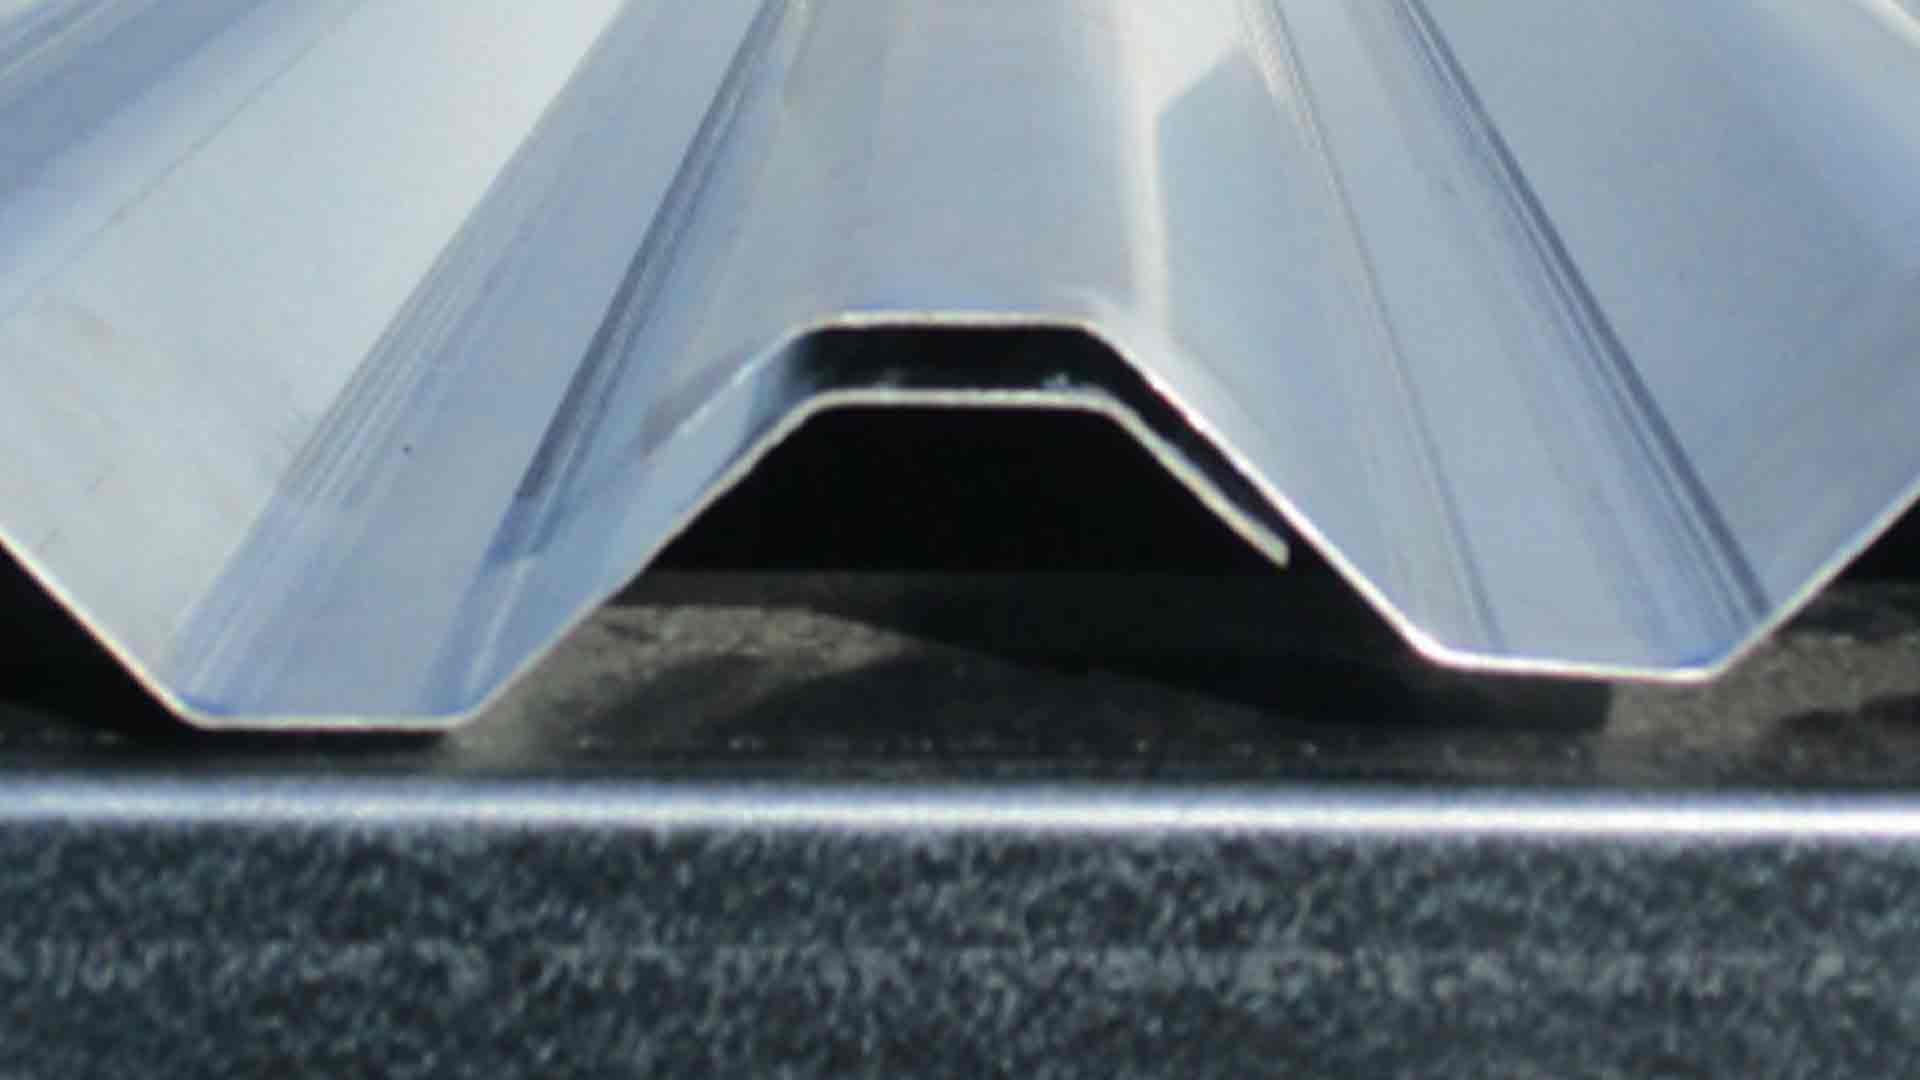
Standard interlocking sidelap is the most commonly used sidelap type. Both roof and floor deck panels are made with this type of sidelap. The sidelaps have a male and female leg that interlock. They can be attached using 3 different methods: button punch, top seam weld, or punchlok. If you are needing to get metal roof or floor deck quickly this is the sidelap you are most likely to find in stock.
If your decking panel has the standard interlocking sidelap and is being connected with either a button punch or top seam weld it will share the same panel name. If it is being connected with the punchlok tool, then it will have a PL in the front of the name. For instance, type HSB-36 and PLB-36 are both identical panels with the same standard interlocking sidelap. The sidelaps for type HSB-36 will either be button punched or top seam welded together, whereas the sidelaps for type PLB-36 will be connected with the PunchLok II tool.
Connection Methods for a Standard Interlocking Sidelap
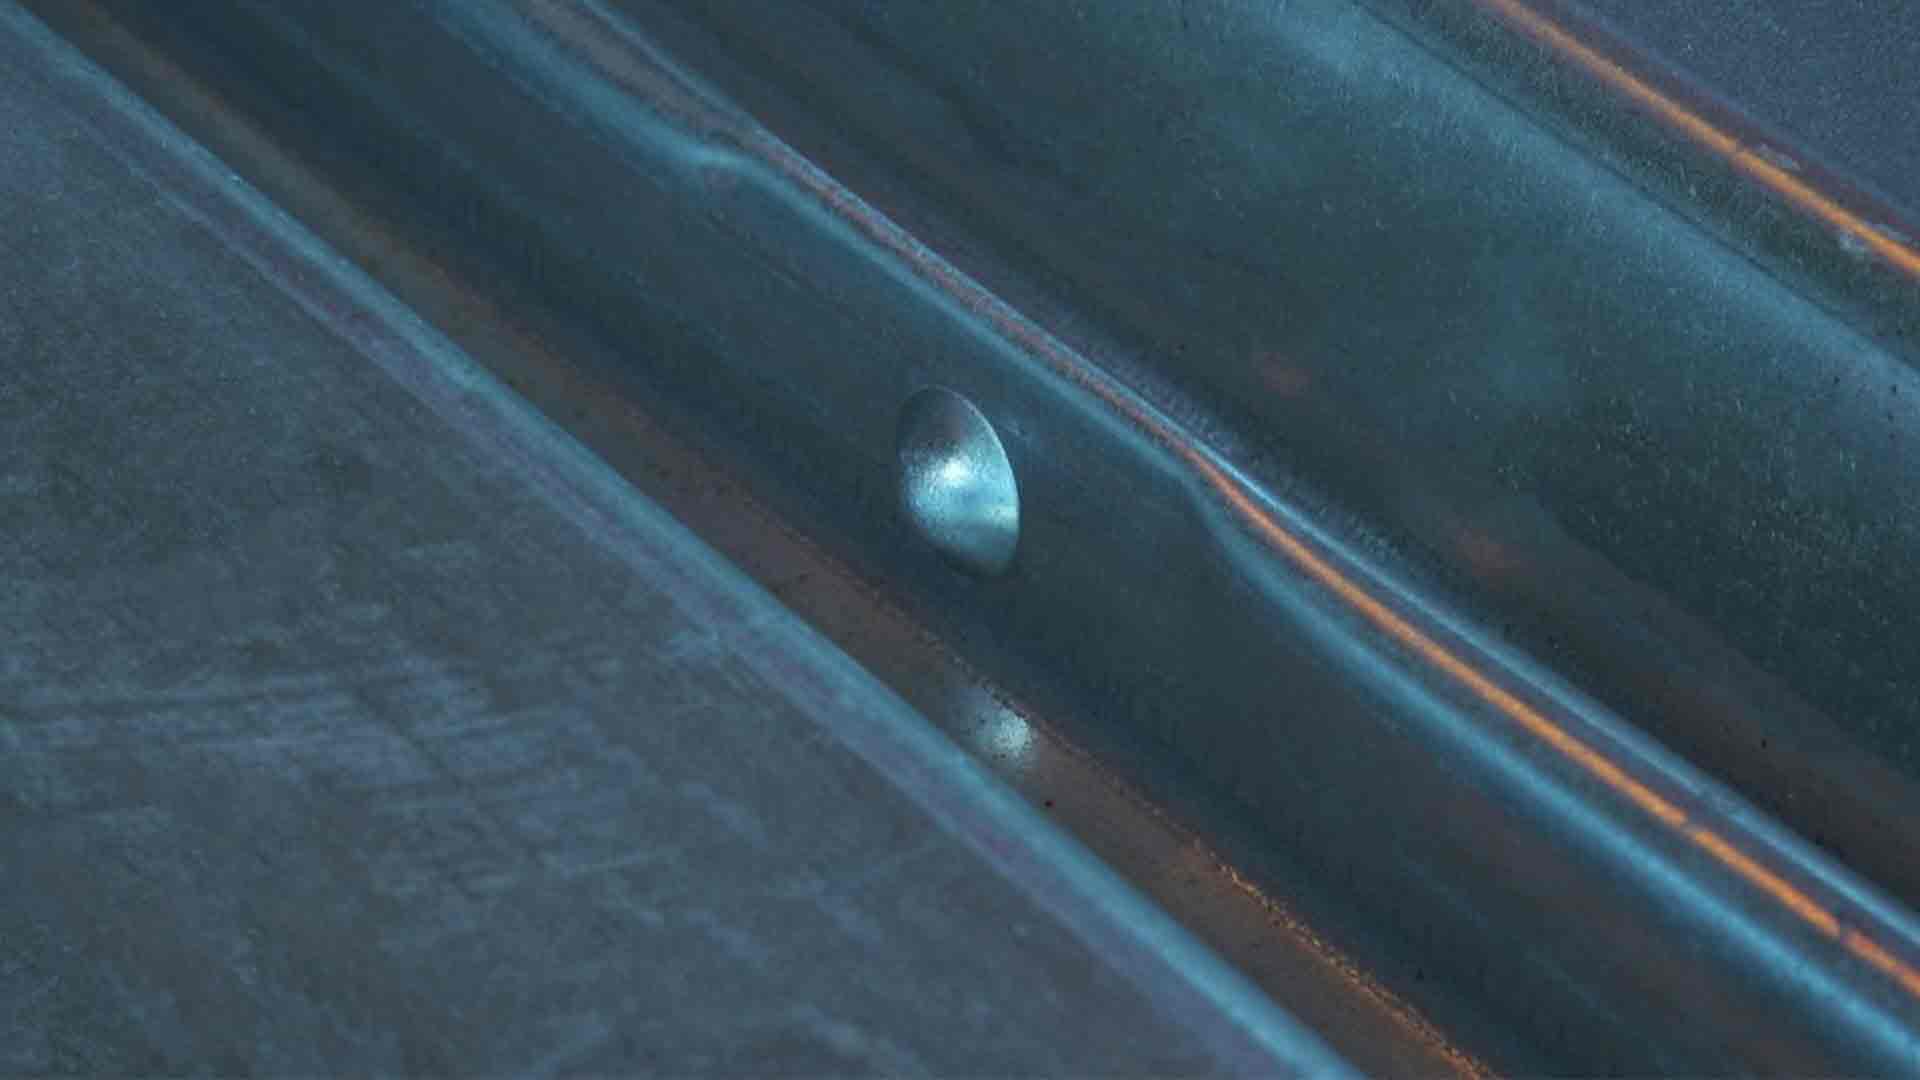
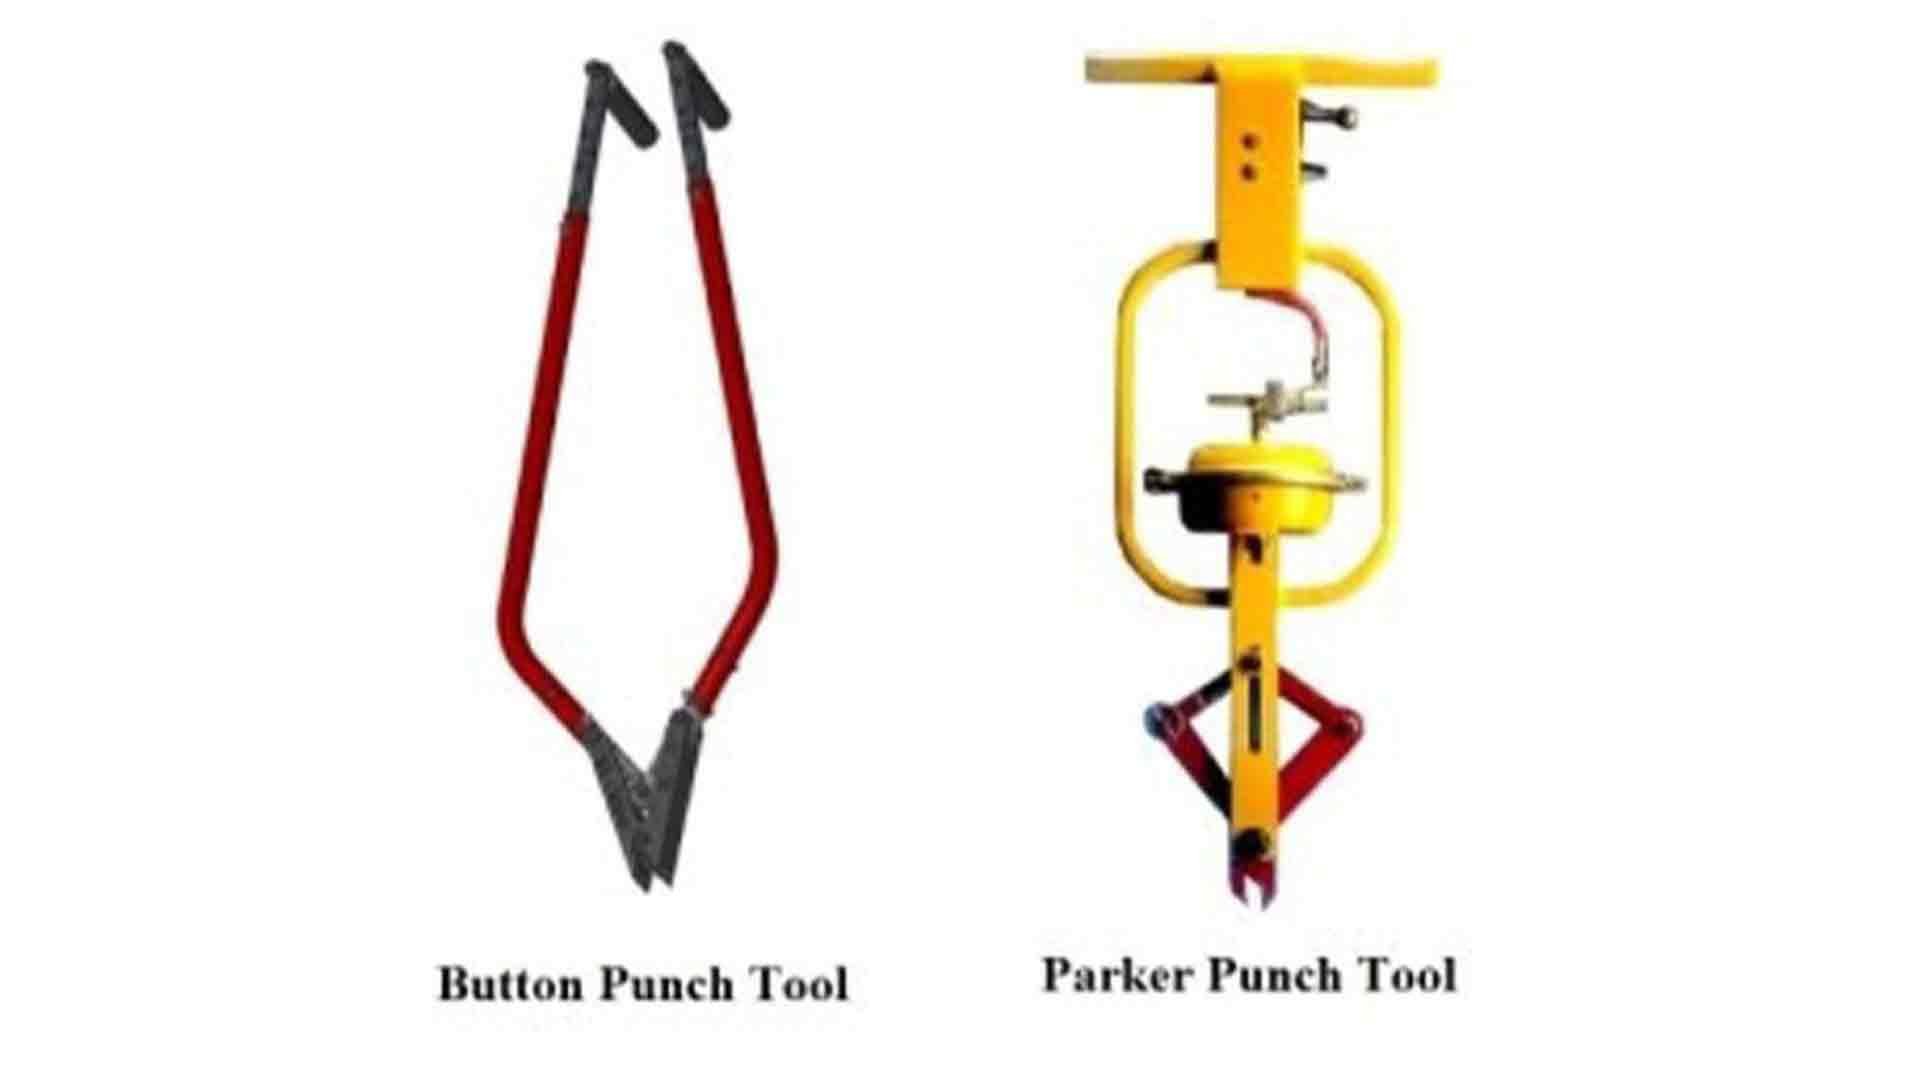
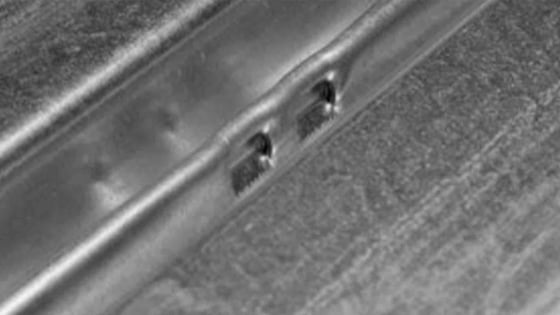
1.) Button Punch Connection
This is the simplest and most common attachment pattern. You can use a manual button punch tool or a pneumatic button punch tool (which runs off an air compressor). The interlocking sidelaps are button punched together using either one of the crimping tools. After the sidelaps are button punched together an average-sized person should be able to stand on the adjacent flute without the joint coming apart.
 |
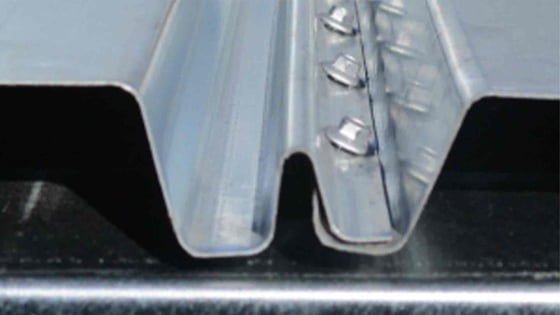
2.) Top Seam Weld Connection
Top seam weld is the most difficult side lap attachment. This is because every spot that requires the seam weld has to be crimped together first, to remove the gap and create a tight fit. The crimp is done by using a crimping tool (which is a button punch tool with the button removed). Once this is done then the weld is performed by a light gauge licensed certified welder.
| 1) Perform crimp to remove gap | 2) Perform weld at the location of crimp |
|
|
|
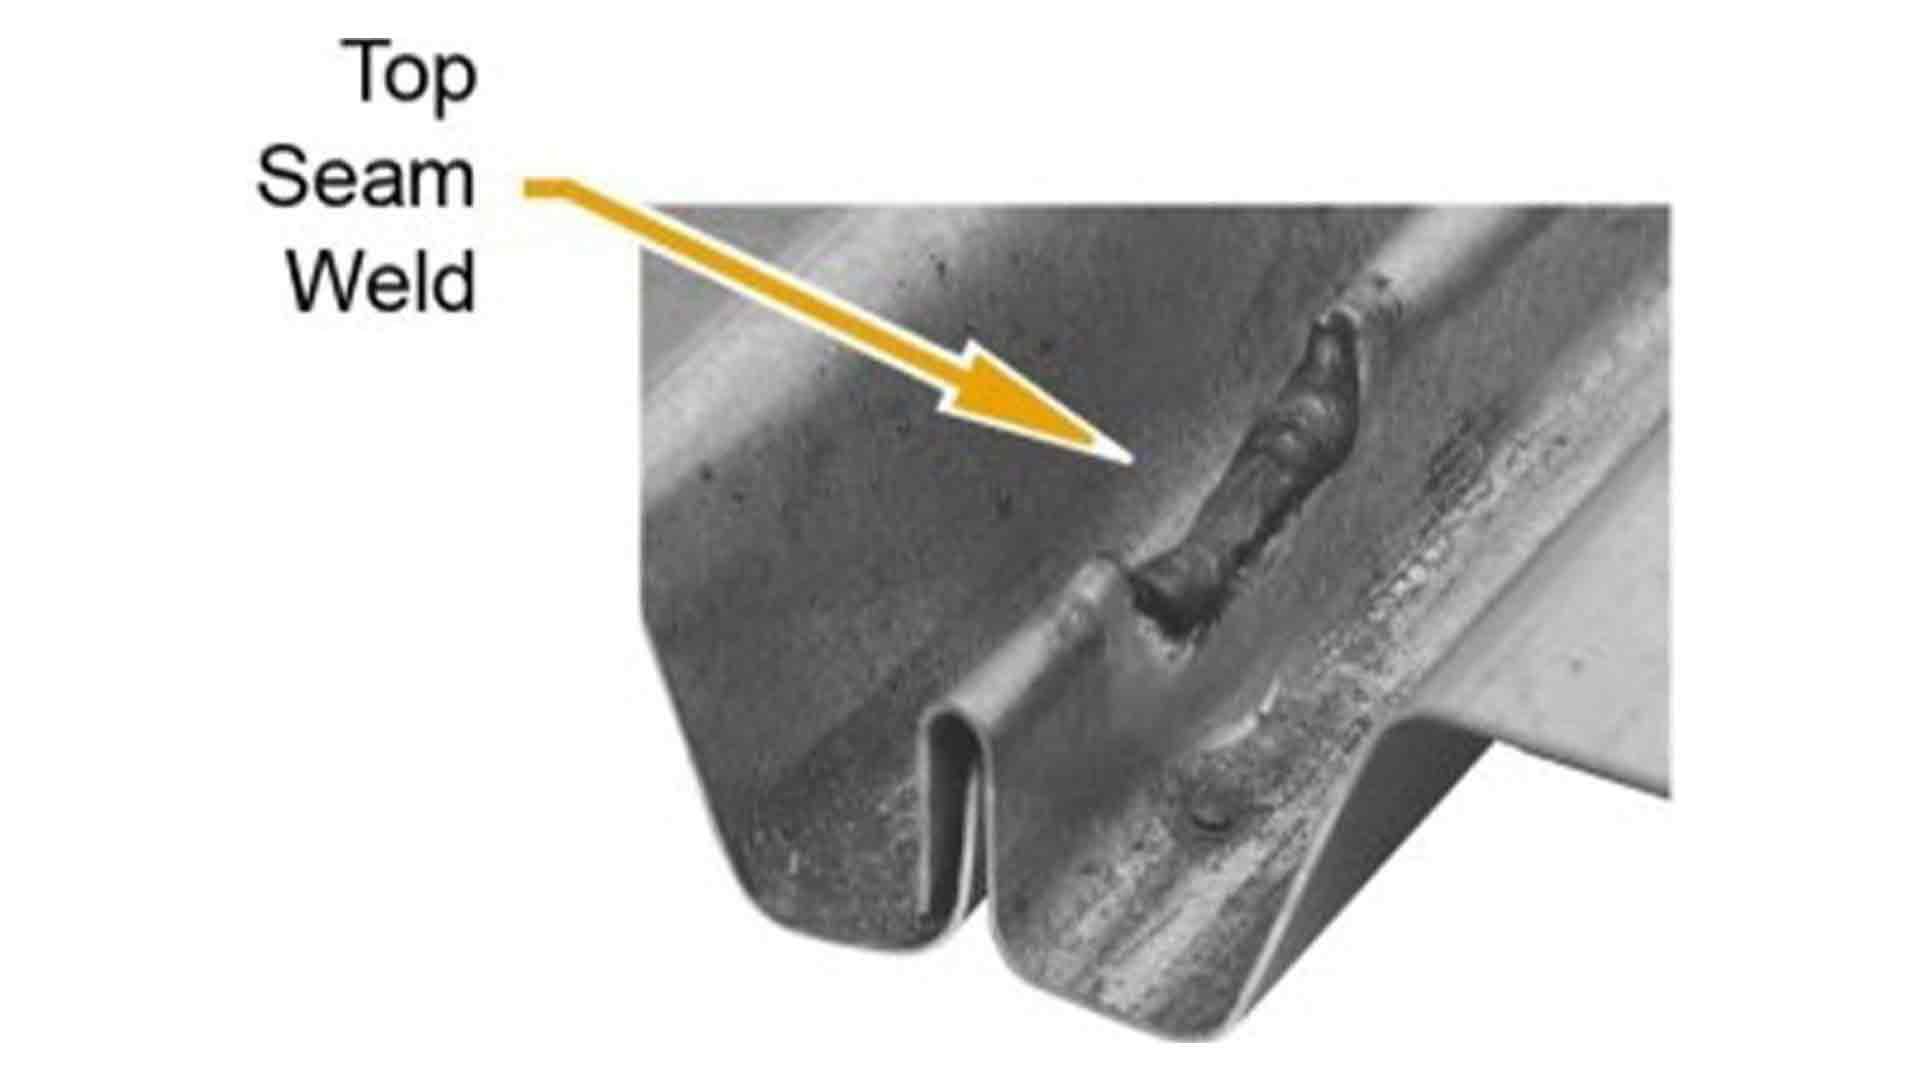
The overall higher strength formed by the connecting panels using top seam welding is higher than the strength formed by traditional button punching. However, since the introduction of the punchlok system (which accomplishes high diaphragm values), top seam welding isn’t used very often. This is because a top seam weld has a higher cost associated with it due to the time and labor it takes to perform.
3.) Punchlok II Connection
With the punchlok (PL) designation, the sidelaps are connected with a pneumatic punchlok tool. This type of connection is referred to as VSC2. Depending on which manufacturer you use VSC2 can stand for Verco Sidelap Connection 2 or Vulcraft Sidelap Connection 2. The connection can only be accomplished by using the PunchLok II tool. The punchlok tool requires the use of an air compressor with 100 psi pressure, which is similar to the size you would use for a nail gun.

The PunchLok II system was designed to increase the metal deck strength. The punchlok connection, increases the strength more then button punching, or stitch screwing the sidelaps. Prior to the introduction of the punchlok system, the only way to obtain high diaphragm values was with top seam welding. However with the punchlok system high values can be obtained at a fraction of the time and cost.
Below are the types manufactured with a standard interlocking sidelap:
| Roof Deck | Floor Deck | ||
| Verco Decking, Inc. | Vulcraft | Verco Decking, Inc. | Vulcraft |
| HSB-36/PLB-36 | 3NI-24 | B-36/PLB-36 FormLok | 1.5VLI/1.5PLVI-36 |
| HSN3-32/PLN3-32 | 1.5BI/1.5PLB | W3-36/PLW3-36 FormLok | 2VLI/2PLVII-36 |
| N-24/PLN-24 | 3NI-32/3PLN-32 | W2-36/PLW2-36 FormLok | 3VLI/3PLVI-36 |
| N-24/PLN-24 FormLok | 2C-36 | ||
| N3-32/PLN3-32 FormLok | 3C-36 | ||
What is a Stitch Screw Sidelap?
The stitch screw sidelap (SS) designation is specified when the interlocking sidelaps are to be connected with screws. The metal deck profile is the same for stitch screw and standard interlocking sidelaps, however, the stitch screw sidelap is made with a shortened male leg and an extended female leg. They interlock and are connected with a screw gun using minimum #10 x 3/4-in. long tek screws without a washer.
This type of sidelap is most often used on roof decks that have built up roofing installed on top. It is very rarely used on floor deck, since a button punch is a cheaper and easier process. A stitch screw sidelap increases the metal deck strength, slightly more than a traditional button punch on roof deck. The extra strength on floor decks is minimal, since the values are based more on the strength of the composite system developed between the panel and the cured concrete.
Below are the types manufactured with a stitch screw sidelap:
| Roof Deck | Floor Deck |
| HSB-36-SS | B-36-SS FormLok |
| HSN3-32-SS | W2-36-SS FormLok |
| N-24-SS | W3-36-SS FormLok |
| N3-32-SS FormLok | |
| N-24-SS FormLok |
What is a Nestable Sidelap?
Nestable deck is the standard sidelap for form decks. The sidelaps overlap and nest into each other. The sidelaps are then attached using self-drilling screws. Nestable form deck can be installed in the normal position, or in an inverted position. How it gets installed depends on the type of application it is being used for.
 |
 |
| Vercor Normal Position | Vercor Inverted Position |
Below are the form deck types:
| Verco Decking | Vulcraft |
| 1 5/16” Deep Vercor | 0.6C |
| 9/16” Shallow Vercor | 1.0C |
| 1.3C |
Which Sidelap Type and Connection is right for me?
The reason for different sidelap types and connections for metal deck varies. Because each project is unique with different requirements and applications, we can’t give you a ‘one size fits all’ answer. You will need to refer to the plans to see what the engineer has specified. When the engineer has specified a certain sidelap it is up to you to purchase the correct type and to connect the sidelaps according to the plans.
There is sometimes a need to request a change based on availability of the metal decking sidelap type. For instance, a customer may have a call out for a stitch screw sidelap, however they are only able to find the panel with the standard interlocking sidelap. Depending on job deadlines, the customer may not have 3 weeks, to wait and have it manufactured. In this case they would need to submit a request to have the sidelap connection changed to the standard interlocking sidelap.
Other factors, such as application of the deck, may require a need to request a change. For instance, using PunchLok on an exposed canopy will lead to holes wherever the sidelaps are connected. This will let light through as well as water when it rains, which the client may not want. In this case you will need to get the change approved. Our sales reps, can assist you with submittal documentation and any questions you may have.
Do You Need Sidelap Connection Tools?
So now that you know how your metal decking sidelaps are supposed to be connected you are ready to start connecting. You may have found that you need a button punch tool or punchlok tool to connect the sidelaps. Or you may find that you are in need of sidelap screws.
At Western Metal Deck, we loan the button punch and punchlok tools to customers who have purchased the decking from us. If you have purchased metal decking from another supplier, you will need to contact them to rent the tools. If you would like to purchase a brand new button punch tool we have them available in stock. Punchlok tools are not available for purchase, those will need to be rented through your metal deck supplier.
To get more information on metal deck related products, check out our metal deck learning center and YouTube channel:
